
3D printing has moved from garage hobby to plug-and-play consumer product in the last few years, and Bambu Lab is one of the main reasons why. If you've been curious about the hobby but worried about setup, tuning or the learning curve, this guide walks you through everything from picking your first machine to running your first successful print — and beyond.
01Pick the right printer for your goals
Before you buy anything, be honest about how you'll actually use the printer. There are three broad buyer profiles in the Bambu Lab lineup:
A · Curious beginner
Mostly PLA. Best pick: A1 Mini or A1 — open-frame CoreXY-style motion, polished setup wizard, AMS Lite for multi-color. The A1 gives a full 256 × 256 × 256 mm build volume; the A1 Mini is 180 × 180 × 180 mm and takes less desk space.
B · Enthusiast
Wants engineering materials too. Best pick: P1S or P2S — fully enclosed CoreXY frames with the enclosure needed for ABS, ASA and nylon. The AMS Combo adds multi-material. The tier most experienced makers land on.
C · Prosumer / small business
Best pick: X1 Carbon Combo or H2D — hardened components for abrasive filaments, Lidar first-layer scanning, AI failure detection and the largest build volumes. The H2D adds laser and cutting modules.
If unsure, most reviewers recommend starting with the A1 Combo — it's the most forgiving learning platform, and you can always upgrade later.
02Set up your workspace
Before the printer arrives, get your space ready. What you need:
- A stable, level surface that doesn't shake when you type or lean on it — vibrations affect print quality on faster machines
- Ventilation, especially for enclosed printers running ABS or ASA (a cracked window is fine; a fume-extraction fan is better for frequent engineering-material printing)
- A standard power outlet within reach — avoid long extension cords
- 15–20 cm of clearance on every side for filament changes, maintenance access and heat dissipation
Nice-to-have from day one: a small toolkit (needle-nose pliers, side cutters, hex keys — often included), nitrile gloves for build-plate handling, extra build plates (textured PEI for matte, smooth PEO for glass-finish bottoms), and 90%+ IPA with lint-free wipes for cleaning between prints.
03Unbox and run first-time setup
Bambu Lab printers ship mostly assembled. Follow the printed quick-start guide — it walks you through:
- Removing shipping locks and foam
- Installing the spool holder and any AMS units
- Connecting Wi-Fi via the printer's screen
- Registering the printer to your Bambu account via the Bambu Handy app or Bambu Studio
- Running the built-in calibration wizard: bed leveling, vibration compensation and Z-offset
The calibration wizard takes 15–30 minutes and is largely hands-off. Don't skip it — it's what makes the printer perform consistently after transport.
04Install Bambu Studio (or OrcaSlicer)
Bambu Studio is the official slicer, free for Windows, macOS and Linux. OrcaSlicer is a popular open-source fork that supports Bambu machines. Either is a solid choice. Once installed: log into your Bambu account, add your printer (auto-detected on the same Wi-Fi in most cases), import a starter STL, slice the model — the software converts the 3D shape into layer-by-layer instructions — and send the job to your printer over the network.
05Choose your first filament
Start with PLA. It's the easiest material to print, doesn't warp much, doesn't smell and is forgiving of bed-level and temperature mistakes. Once comfortable, expand:
- PLA — beginner material, great for models, decorations, prototypes
- PETG — tougher than PLA, food-safe grades exist, moderate difficulty
- TPU — flexible, needs slower speeds, moderate difficulty
- ABS / ASA — engineering-grade, needs an enclosed printer (P1S / X1 / H2D)
- PA (nylon) — strong, needs an enclosed printer and drying setup
- PC (polycarbonate) — very strong, high temperature, expert-level
Bambu-branded filaments are RFID-tagged and auto-detected, which makes the AMS flow smoother. Third-party filaments work fine but need manual profile setup.
06Print your first real model
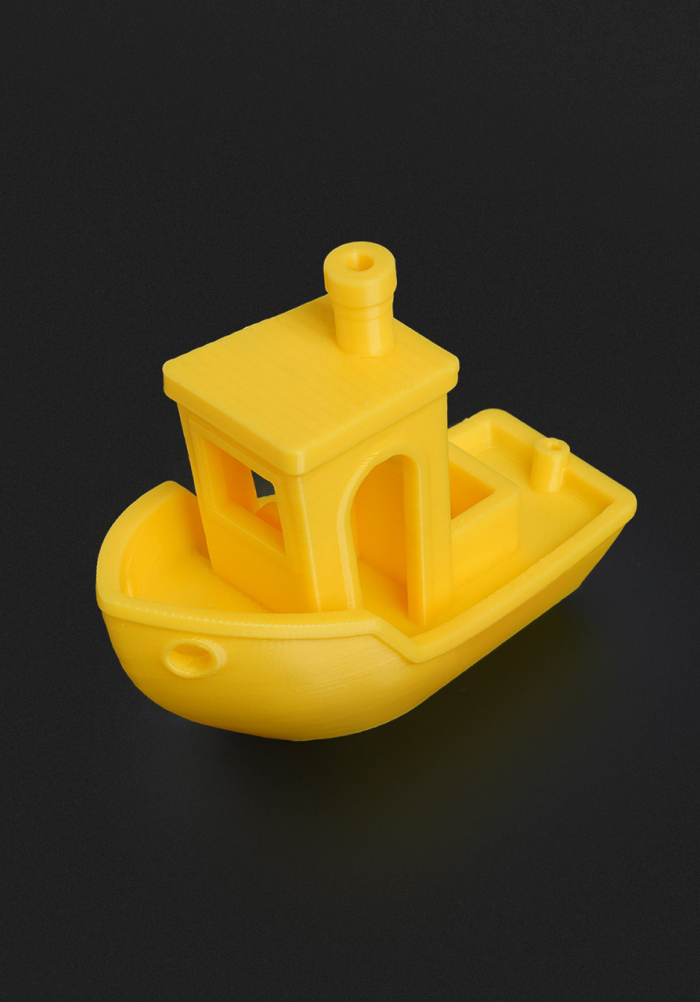
Once the calibration cube prints cleanly, try something you actually want. Thingiverse, Printables and MakerWorld have millions of free STL files. Good starters: a simple phone stand or desk organizer, a benchy (calibration boat — everyone prints one, and it's a good stress test), or a single-color model you'll use daily.
Print settings for a first "real" model on PLA:
- Layer height: 0.20 mm (balance of speed and detail)
- Infill: 15–20% gyroid
- Wall count: 3
- Print speed: use Bambu's stock profile — it's already tuned
- Supports: enabled if the model has overhangs beyond 45°
Expect 1–3 hours for something desk-sized. Watch the first layer complete before walking away — that's where most failures happen.
07Common beginner pitfalls (and fixes)
Bed adhesion fail
The print won't stick. Fix: clean the build plate with IPA, re-run the auto Z-offset, verify the plate is dry (fingerprints matter).
Stringing
Thin plastic threads between separated parts. Fix: enable retraction in your slicer profile, or lower print temperature by 5°C.
Layer shifts
The print visibly jumps sideways partway through. Fix: check that shipping locks are removed, run vibration-compensation calibration, reduce top speed slightly.
Warping corners
Corners lift off the plate (common with ABS). Fix: use an enclosed printer with a heated chamber, add a brim, ensure the bed is fully at temperature before starting.
AMS mis-feeds
A multi-material print stops with a filament error. Fix: check spool tension, keep the AMS lid closed to block moisture, and pause-resume rather than cancelling if possible.
Studio can't find printer
The slicer doesn't detect your machine. Fix: confirm both are on the same Wi-Fi (not a 5 GHz / 2.4 GHz mismatch), re-log into Bambu Handy, or use LAN mode with the SSID and access code.
08Level up over time
Once you're comfortable with basic prints, expand your skills: multi-color printing with AMS or AMS Lite; engineering materials (ABS, PA, PC) once you have an enclosed machine; post-processing (sanding, priming, painting, gluing multi-part models); custom design in Fusion 360, Blender or Tinkercad; and print-farm workflows running multiple printers off one Bambu Studio setup.
Recommended first machine
| Best for | Recommended model | Why |
|---|---|---|
| Absolute beginner, small desk | A1 Mini | Cheapest, easiest, small footprint |
| Beginner wanting full-size volume | A1 Combo | 256 mm cube + multi-color, still beginner-friendly |
| Enclosed mid-range | P1S Combo | ABS/ASA capable, best value enclosed |
| Prosumer / small business | X1 Carbon Combo | Lidar + AI + hardened for CF/GF filaments |
| Advanced all-in-one manufacturing | H2D | Adds laser and cutting to 3D printing |
Bambu Lab — start with the A1 Combo
The most forgiving learning platform: polished setup, a full 256 mm cube and multi-color via AMS Lite. Print your first benchy the day the box arrives, then grow into the P1S or X1 Carbon.
🔒 Prices and availability accurate at time of writing. Affiliate link — we may earn a commission at no extra cost to you.
FAQ
Do I need prior experience? No. The setup wizards, cloud slicer and mobile app are designed for first-time users. If you can follow a printed quick-start guide and use a smartphone, you can operate a Bambu Lab printer.
How much space does one take up? The A1 Mini fits on most desks. The A1, P1S, P2S, X1 Carbon and H2D are roughly the footprint of a small microwave. Leave about 15–20 cm around each side.
What ongoing costs should I expect? Filament is the main cost — a 1 kg spool of PLA runs roughly $18–$25 depending on brand and type. Occasional consumables: build plates, nozzle replacements, the odd belt or fan. Bambu machines are known for low maintenance overhead.
Should I buy the AMS Combo or standalone? If you think you'll ever want multi-color or auto-continue-on-empty-spool, buy the Combo up front — adding an AMS later costs more. If you're certain you'll only print single-color functional parts, save the money.
Is 3D printing safe indoors? PLA and PETG are generally low-emission and widely printed in homes. ABS, ASA and nylon emit stronger fumes and are better run in enclosed printers with ventilation. Never leave a printer running completely unattended, and consider a smoke/heat alarm nearby regardless of brand.
Wrapping up
3D printing is one of the most rewarding maker hobbies of the last decade, and Bambu Lab has arguably made it more accessible than any brand before. The A1 Mini gets you printing today for a beginner-friendly price; the P1S Combo and X1 Carbon Combo grow with you as your skills expand. The best time to buy is during Bambu Lab's anniversary-sale windows, when the entire lineup sees deep discounts.
Want gear like this on your content calendar?
Join AffluencerHub, get AI-matched to brand programs that fit your audience, and track every click to commission in one place.
Apply as a Creator